
Introduction:
Owning a website is similar to having a digital identity in the huge online world. WordPress is your dependable partner whether you’re a beginning blogger, a small company owner, or just a person looking to express your passions online. And if you’ve selected Hostinger as your hosting company, your trip into the realm of web design will go smoothly. This article will explain how to install WordPress on Hostinger, enabling you to easily and precisely realize your online ambitions. Let’s go on this voyage together, whether you’re a computer newbie or an experienced enthusiast, and make sure your online presence glistens in the virtual cosmos.
Millions of websites worldwide are powered by WordPress, one of the most well-liked content management systems (CMS). You’re in the right place if you’ve decided to use Hostinger as your hosting company and want to learn how to install WordPress there. This comprehensive guide will walk you through every step of installing WordPress on Hostinger.

Why People Choose Hostinger ?
Hostinger is a popular web hosting provider that offers a wide range of plans and features to suit the needs of businesses and individuals of all sizes. Some of the reasons why people choose Hostinger include:
Affordability: Hostinger shared hosting plans start at just $1.99 per month, and they come with a free domain name, SSL certificate, and other essential features.
Ease of use: Hostinger’s control panel is designed to be user-friendly, even for beginners. It’s easy to navigate and find the features you need to manage your website.
Performance: Hostinger’s servers are fast and reliable. They use LiteSpeed technology, which is known for its speed and efficiency.
Customer support: Hostinger provide 24/7 customer support via live chat, email, and phone, also available on holidays. Their support team is knowledgeable and helpful, and they’re always willing to go the extra mile to help you with your hosting needs.
Features: Hostinger offers a wide range of features that are not available with other web hosting providers. These features include a free domain name, SSL certificate, website builder, and more.
Overall, Hostinger is a great choice for businesses and individuals of all sizes who are looking for an affordable, reliable, and user-friendly web hosting provider.
Here are some additional reasons why people choose Hostinger:
Uptime: Hostinger has a reliable uptime of 99.9%, which means that your website is likely to be up and running 24/7.
Security: Hostinger takes security seriously. Their servers are protected by firewalls, DDoS protection, and other security measures.
Free extras: Hostinger offers a number of free extras with its plans, such as a free domain name, SSL certificate, and website builder.
If you’re looking for a reliable, affordable, and user-friendly web hosting provider, Hostinger is a great option.
There are 3 Methods to Install WordPress On Hostinger:
Method 1: Buy WordPress Hosting Plan From Hostinger.
Method 2: Using Hostinger Auto Installer.
Method 3: Install WordPress Manually.
Method 1: Buy WordPress Hosting Plan From Hostinger.
A WordPress hosting plan is a type of web hosting that is specifically designed for WordPress websites. These plans typically include features that make it easy to install and manage WordPress, such as one-click installation, automatic updates, and security features.
There are many different WordPress hosting providers to choose from, each with its own set of features and pricing plans. When choosing a WordPress hosting plan, it is important to consider factors such as the size and traffic of your website, the features you need, and your budget.
How To Buy WordPress Hosting Plan From Hostinger ?
Step 1: Visit Hostinger Website, ( Get Upto 80% off ) Then click on “WordPress” menu on the top. see the screenshot bellow.

Step 2: Choose Your Hosting Plan:
For wordpress hosting plan there are three plan: Premium, Business And Cloud Startup. Select your plan and click on “Add To Cart” button.

Step 3: Select Your Plan Duration And Procced To Payment
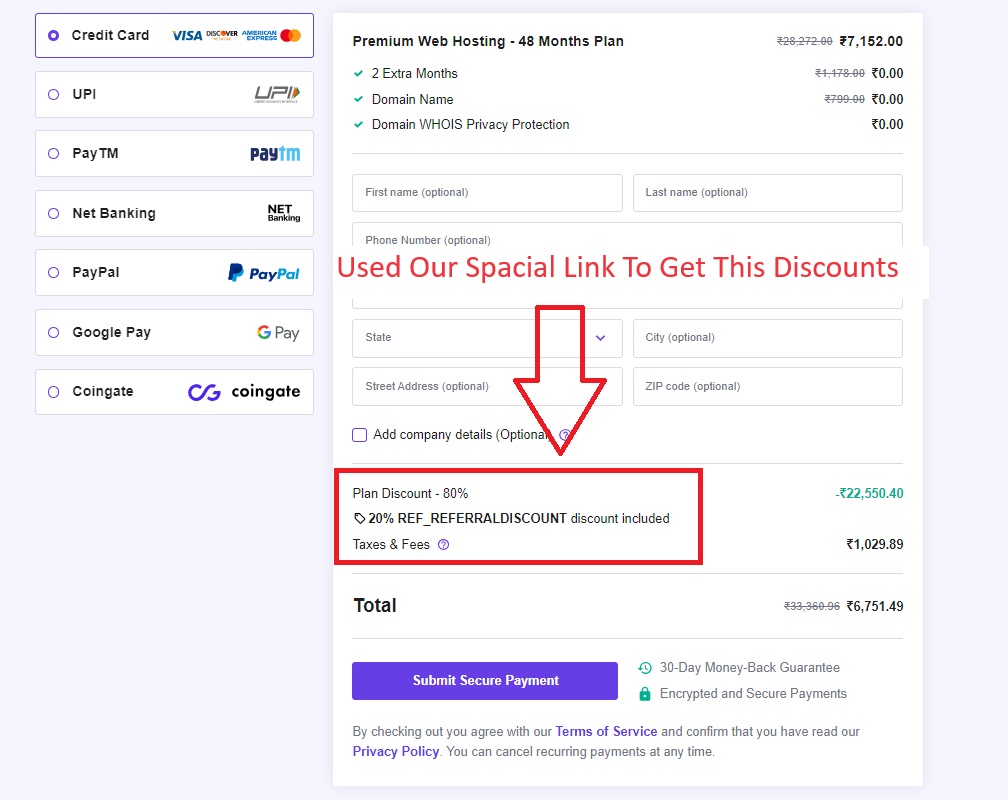
Select Your Plan duration, 48 month plan is best , you will get higher discounts on this. select your plan and scroll down.

For extra discounts used our spacial link, this link will autometically apply discounts without any coupon code required
After compleated your payments, you need to login on hostinger and claim your free domain. after you claim your free domain, wordpress will be autometically installed. now you can login to worpress dashboard. to loging your wordpress dashboard you can visit this URL example.com/wp-admin.
Method 2: How To Install WordPress On Hostinger Using Auto Installer.
Before You start to installing wordpress using Auto Installer, buy a hosting plan by visiting this Hostinger Website.
If You dont’t know how to buy hosting plan plaase follow the Step in Method 1.
After Purchased Hosting Plan Then Login To Hostinger Dashboard And You Will see “CLAIM DOMAIN” option, by clicking this option you can claim your free domain from hostinger.
Now You Are ready for installing wordpress using auto installer, to install the wordpress follow the step bellow.
Install WordPress Using Auto Installer:
To install the wordpress you need to login in hostinger dashboard. after you login in hostinger dashboard then click on “Website” from top menu option.
When “website” tab is open then scroll down and click on “Create or Migrate a Website”, See the screenshot bellow:

After click on “Create or Migrate a Website” a new page will be open where you can see two option “Create A New Website” And “Migrate A Website“.
Select the option “Create A New Website“, after that a new page will be open same as bellow screenshot. In this page you have to select your platfrom, select “WordPress” as your platfrom,

After select wordpress then you a new page wil be open where you have to create wordpress account. To create your wordpress account you have to put a email id and password. Then click on “Continue” button.
After that two new page will open where ask you to install some plugin and template for your wordpress site. For now click on “Skip” button for Now. you can add plugin or theme from your wordpress dashboard.
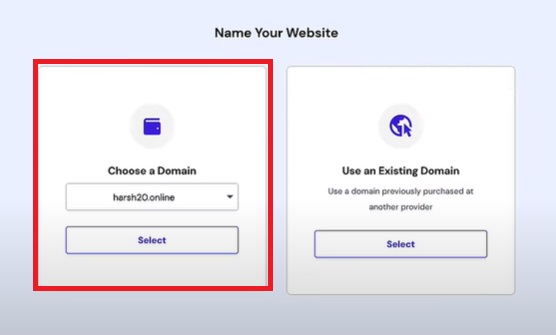
When you “skip” both page then a new page will be onen where you have to select your domain name from the dropdown then click on “Select“, see the screenshot bellow:
After select your domain click on “Finish” button on next page then you can see wordpress is started to installing and this can be take upto 5 to 10 min to complete the wrodpress installation.
Now your wordpress is installed, you can now login to your wordpress dashboard.
If have any problem to inatall wordpress using auto installer, then you can install wordpress manually by following method 3.
Read Also: How to Install WordPress On Localhost
Method 3: Install WordPress Manually:
Follow 3 Step To Install WordPress Manually On Hostinger:
Step 1: Download Wrodpress File.
Step 2: Create A “public_html” folder in Hostinger File Manager.
Step 3: Paste WordPress File Inside “Public_html” Folder.
Step 1: How To Download Wrodpress File.
To Download the latest version of wordpress you have to visit official wordpress website and you will see download option and click on download.
After Download is completed, now you have a zip file of wordpress, now you have to extract it and save into a folder.
Step 2: How To Create A “public_html” folder in Hostinger File Manager:
To create a “public_htlm” folder you have to login in your hostinger dashboard then click on “Hosting” tab from the top menu after that select your domain name. after selecting the domain you can see “File Manager” Option and click on it.
When you click on “File Manager”, it will open a new window and this is your File Manager Area, here you have create a new folder and name it “public_html“.
Step 3: Paste WordPress File Inside “Public_html” Folder:
This is the final step for installing wordpress in on hostinger, Copy the wordpress extracted file and paste into in your “public_html” folder, that’s it.
Now you can login to wordpress dashboard.
Some FAQs Related To Installing WordPress On Hostinger:
Q: Do I need technical skills to install WordPress on Hostinger?
No, you don’t need advanced technical skills. Hostinger’s one-click installer makes it easy for beginners to install WordPress without any coding knowledge.
Q: What are the minimum hosting requirements for WordPress on Hostinger?
Hostinger’s shared hosting plans meet the minimum requirements for WordPress. These typically include PHP 7.4 or higher, MySQL 5.6 or higher, and a compatible web server like Apache or LiteSpeed.
Q: Can I install WordPress on Hostinger if I already have a website?
Yes, you can install WordPress on Hostinger even if you already have an existing website. You can create a subdomain or install WordPress in a subdirectory to keep your old website intact.
Q: Is it possible to install a custom theme on WordPress hosted on Hostinger?
Yes, you can install custom themes on your WordPress website hosted on Hostinger. WordPress allows you to upload and activate themes of your choice.
Q: How can I secure my WordPress installation on Hostinger?
You can enhance WordPress security on Hostinger by keeping it updated, using strong passwords, installing security plugins, and regularly backing up your website.
Q: Do I need to purchase a domain separately to use WordPress on Hostinger?
Hostinger offers both hosting and domain registration services. You can either purchase a domain through Hostinger or use an existing domain from another registrar.
Q: Can I migrate an existing WordPress site to Hostinger?
Yes, you can migrate an existing WordPress site to Hostinger. Hostinger provides guides and tools to help you with the migration process.
Q: Can I install multiple WordPress sites on a single Hostinger hosting account?
Yes, you can install multiple WordPress sites on a single Hostinger hosting account, depending on the hosting plan you choose. Some plans allow for unlimited websites, while others may have limitations.
Q: What is the difference between manual and automatic installation of WordPress on Hostinger?
The manual installation of WordPress on Hostinger gives you more control over the installation process. You can choose the specific version of WordPress that you want to install, and you can install WordPress on a subdomain or subdirectory of your domain name. The automatic installation of WordPress on Hostinger is a more automated process that makes it easier to install WordPress.
Q: What are the risks of manually installing WordPress on Hostinger?
There are a few risks associated with manually installing WordPress on Hostinger:
If you make a mistake during the installation process, it could damage your website.
You are responsible for backing up your website before you start the installation process.
If you have any problems with the installation, you will need to troubleshoot them yourself.